


Tips & Techniques: DIY Metal Finishing
This article appeared originally in the May 2006 issue of American Rifleman. To subscribe to the magazine, visit the NRA membership page and select American Rifleman as your member magazine.
Refinishing the metalwork of a firearm is not as complicated as you might think, and the options have changed over the years. In days past, you needed bluing tanks and all the toxic chemicals that process entailed. While bluing is still an excellent way to finish a rifle, the hobby gunsmith will likely have better results with spray-on coatings. In fact, with the stainless steel guns so popular today, a spray-on coating is the one of the few options for a new finish.
A coating-type finish not only looks good, it protects the metal from rust in a way that bluing cannot. Bluing is a form of rust, and to protect it, a barrier to water, such as oil, must be applied. Coating finishes, on the other hand, act as barriers themselves that insulate the metal from moisture.
- Buy All-American!
- Bring health and vitality back to your body with these non-transdermal patches
- Get your Vitamin B17 & Get 10% Off With Promo Code TIM
- How To Protect Yourself From 5G, EMF & RF Radiation - Use promo code TIM to save $$$
- The Very Best All-American Made Supplements On The Market
- Grab This Bucket Of Heirloom Seeds & Save with Promo Code TIM
- Here’s A Way You Can Stockpile Food For The Future
- Stockpile Your Ammo & Save $15 On Your First Order
- Preparing Also Means Detoxifying – Here’s One Simple Way To Detoxify
- The Very Best Chlorine Dioxide
- All-American, US Prime, High Choice Grass-Fed Beef with NO mRNA, hormones or antibiotics... ever!
There are several coating-type metal finishes on the market, but most require oven drying. A rifle’s barreled action is often too long to fit in the kitchen oven, so that means buying or building an expensive shop oven, which can be a problem for a hobby gunsmith.
At least one coating, DuraCoat, by Lauer Custom Weaponry and available from MidwayUSA, can air dry. DuraCoat is available in myriad colors, including neon. Their clear coat can protect bluing, so I used that on a Winchester 94 I was refinishing.
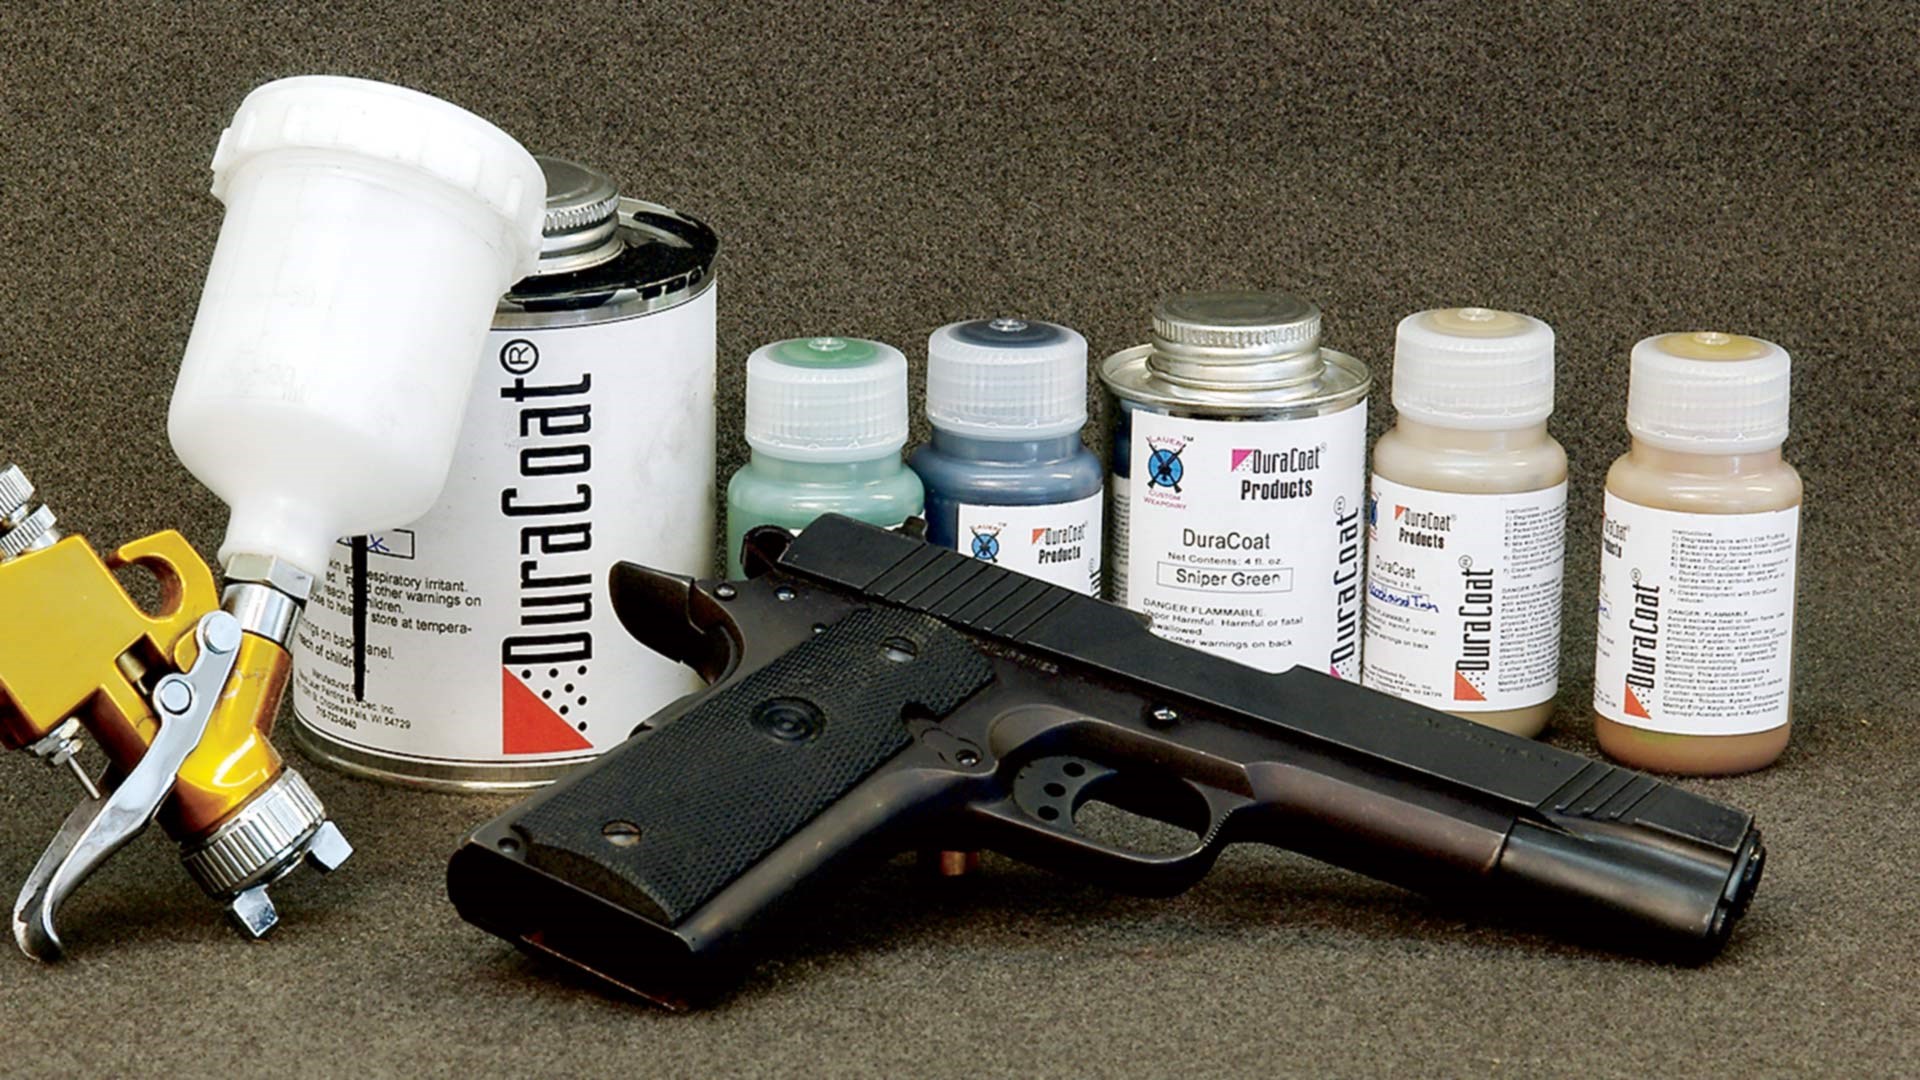
I had considered something like Electric Lavender, but eventually settled on a more hunting-appropriate color called SOCOM, which is designed for tactical guns. This low-key, non-reflective gray with a slight hint of green was a perfect color for a hunting gun. On my .458 Win. Mag. rifle, I used flat black.
When I built a .358 Win. Mag. on a Remington Model 700 action, I used a color called Sniper Green on the metal and flat black on the stock. That gun was dubbed “The Green Goblin” by a hunting buddy. The point is that the options are wide when it comes to colors. When you consider that you can combine colors to custom-mix your own, your palette is almost limitless.
It is so easy to apply that I got it pretty-much right on the first try, even though I am not good at any kind of task that even resembles painting. Believe me, if I can do this, anybody can. I use a relatively inexpensive gravity-feed spray gun powered by my shop air compressor. But I have also used one of the DuraCoat Finishing kits that come with an airbrush sprayer, propellant, hoses and all the materials.
All the metal must be degreased with a solvent that dries without residue. This can be done with aerosol spray cans of degreasing agent, but it’s better in every circumstance—and necessary if the barrel and action are together—to have a tank of degreasing solvent for soaking parts. I use DuraCoat TruStrip Solvent and one of its solution tanks. The tank is long enough to put in the entire barreled action with room left over.
I scrubbed the gun with a small brush and then let it soak for half an hour before letting it air dry. After that, I handled the gun only while wearing gloves.
DuraCoat can be applied over just about any clean surface, so I simply degreased the rifle and coated over the old bluing. I roughed it up a bit with a Scotchbrite pad, then I degreased and sprayed. The result was actually pretty good, but not as durable or even-looking as when the metal is prepared thoroughly.
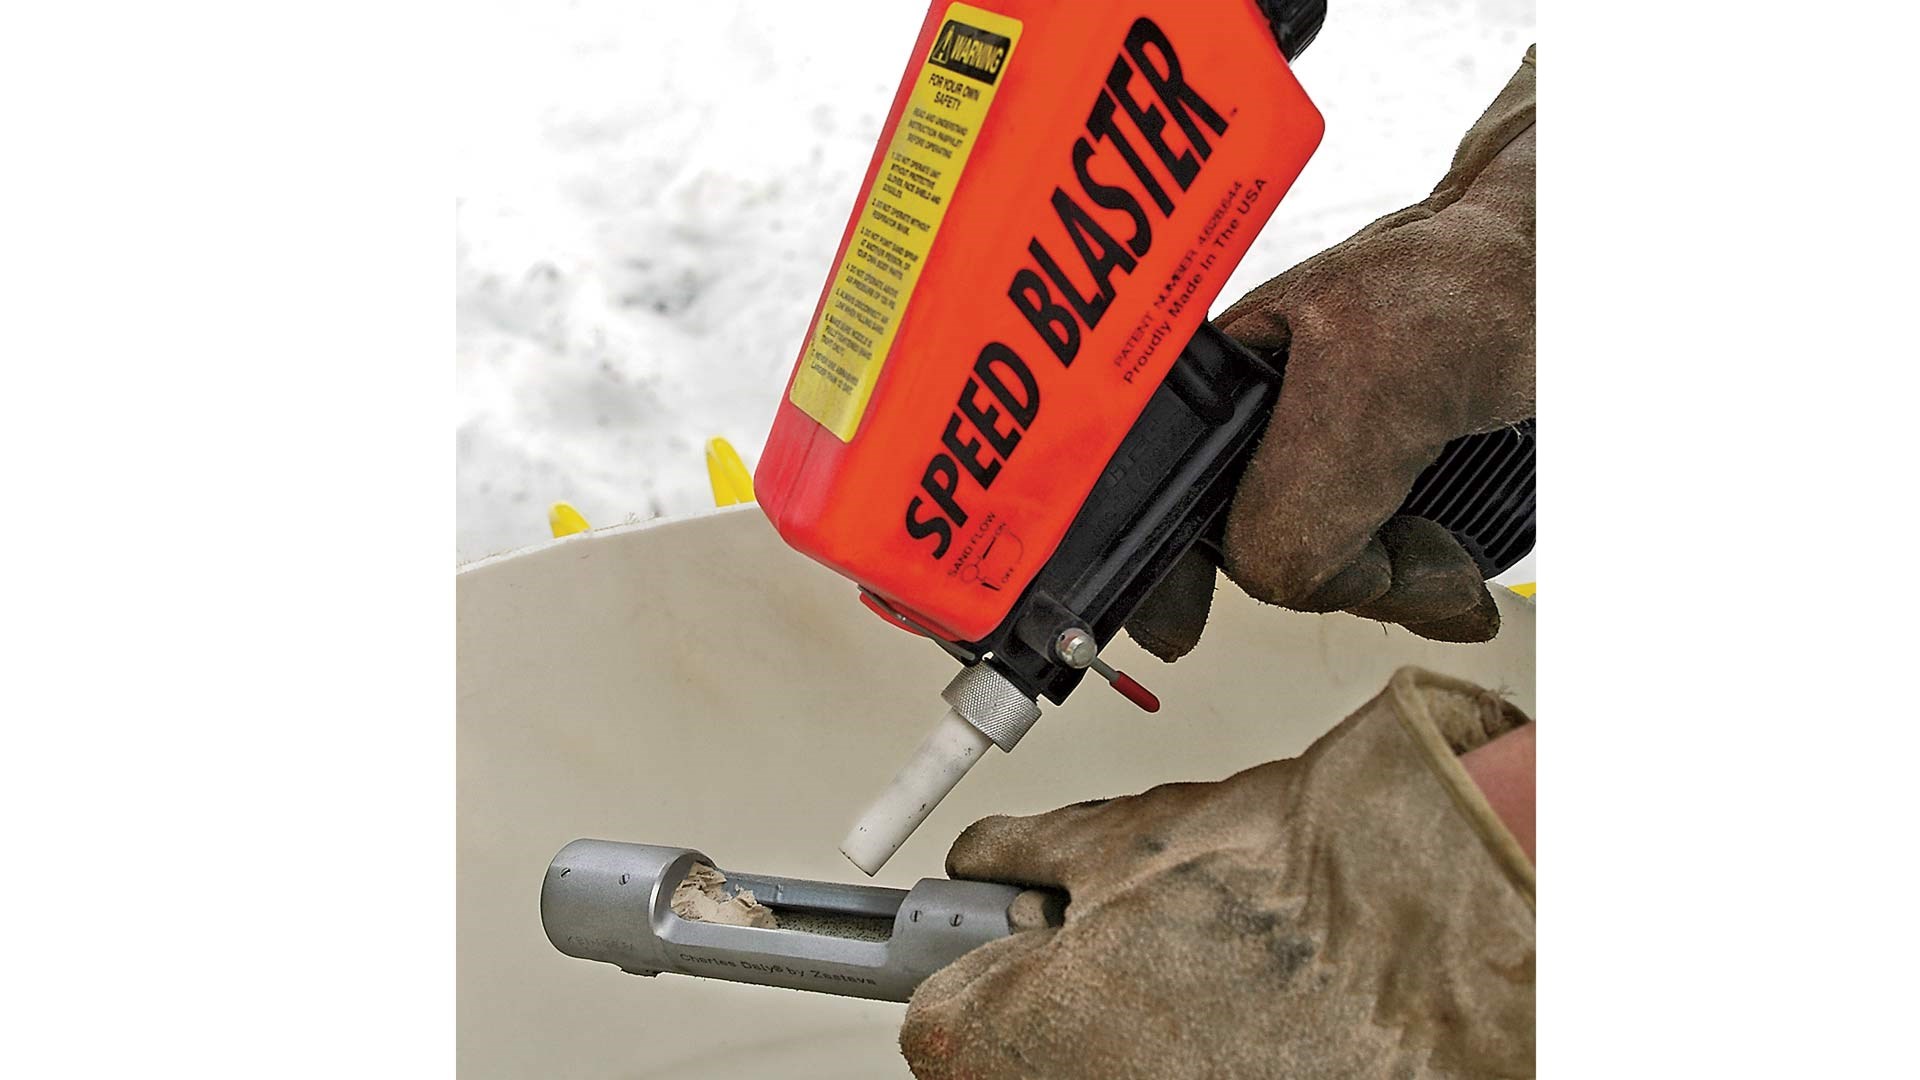
The best approach is to sandblast the metal parts to be coated so that the DuraCoat has plenty of area to adhere. The rough surface from sandblasting actually increases surface area for the DuraCoat to grip and gives it “teeth.”
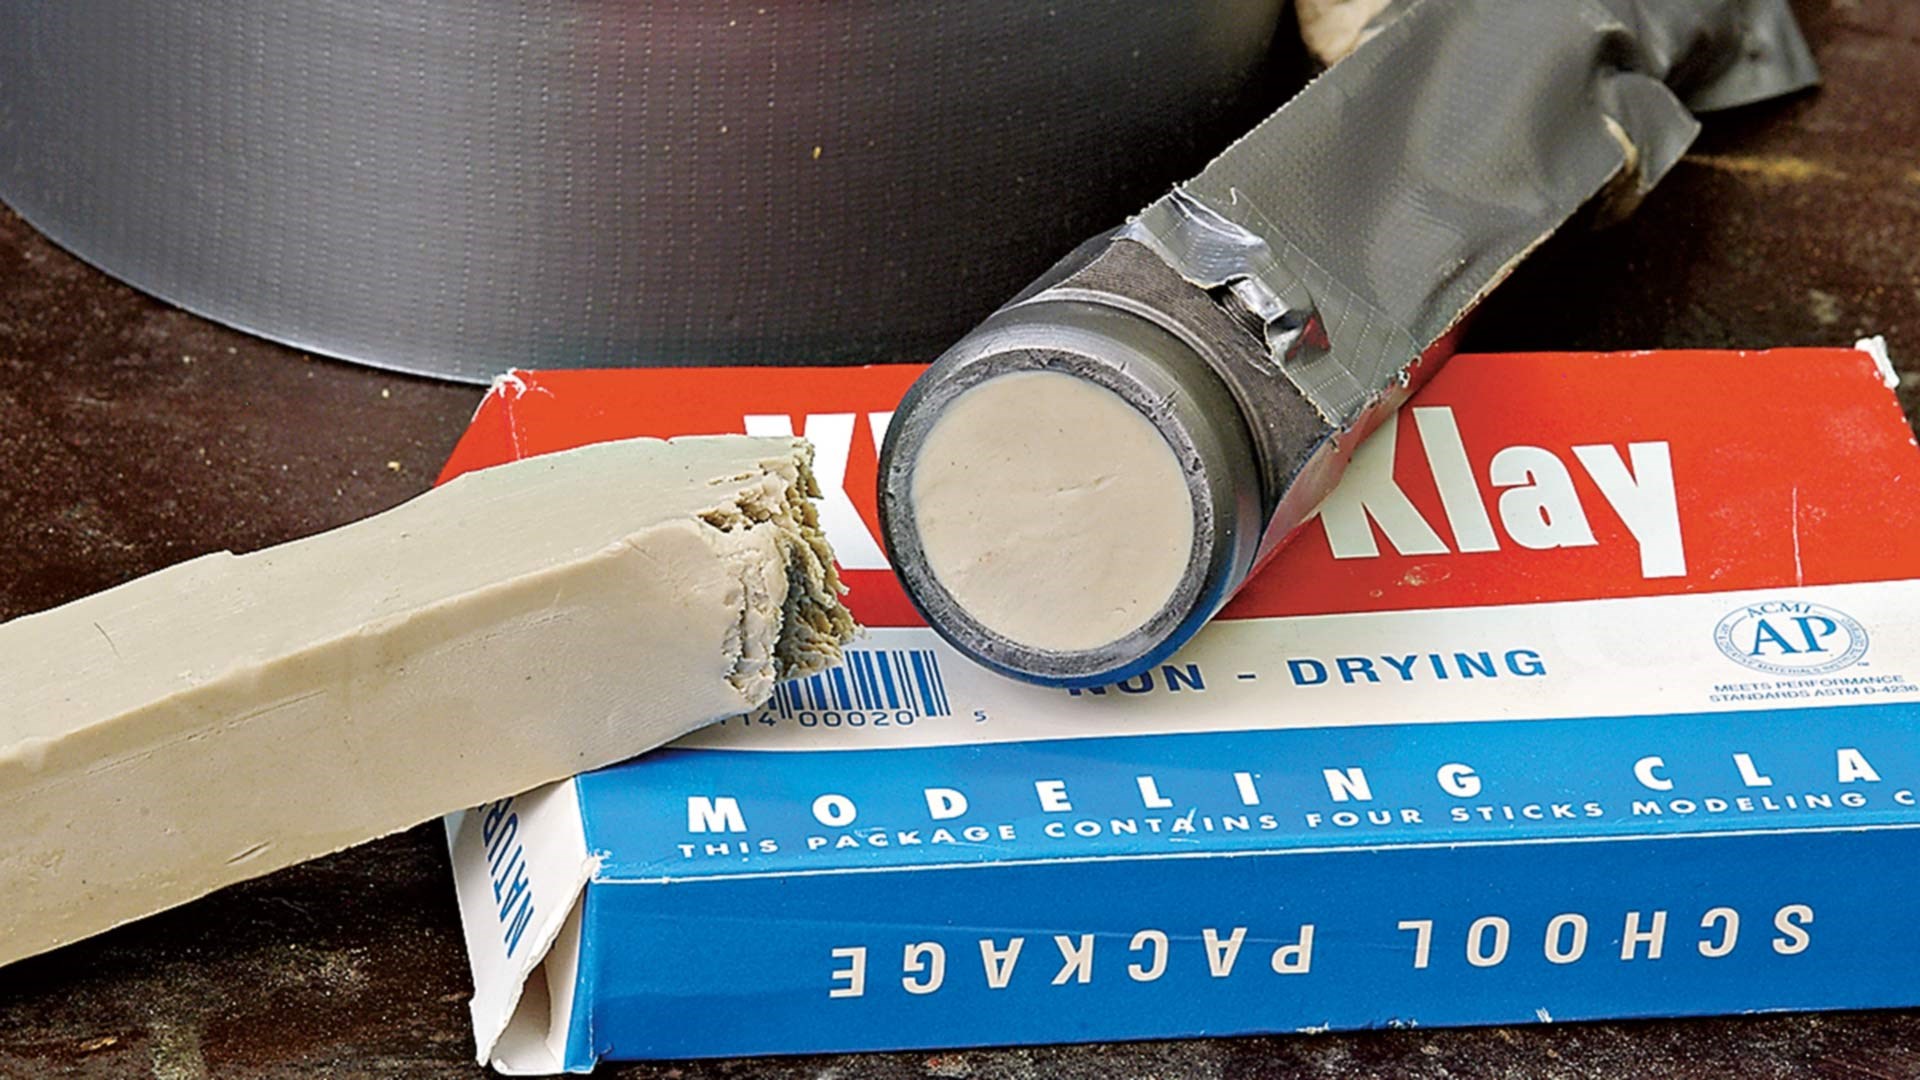
Tape off anything you don’t want sandblasted with several layers of masking tape. Plug any holes with modeling clay.
For my first projects, I used the gravity-feed sandblaster and worked outdoors, considering the sand a consumable. But, it wasn’t long before I invested in an enclosed blasting cabinet where the sand can be recovered and where the blasting is done inside a closed environment.
Keep the sandblaster moving, and watch the metal so that you have an even sheen to the finish.
If you are not using a cabinet, be sure to wear thick leather gloves, long sleeves, a respirator, face shield and goggles. I know from painful experience that high-velocity sand will take skin off your hands in a split second.
Don’t forget to sandblast all the small parts that you are planning to coat. That includes the bottom metal, scope mounts, action screws and even the bolt. If you decide to coat the bolt, make sure to tape off the lugs, as you do not want to sandblast or coat them.
One thing to remember is that any screw that shows on both sides of the rifle must be prepped and coated on both ends.
Do you wonder how I know that? I coated only the heads on those screws on my Winchester Model 94 project. Of course I discovered that mistake after cleaning up the spray gun and putting it away. I had to mix up more DuraCoat, spray the ends of the screws, then dump out the excess and clean the airbrush again.
It’s a lesson I will remember. Once all the metal has an even texture, remove all the tape and clay. Degrease again if needed.
It is a simple matter to follow the directions to set up the airbrush or spray gun and to mix the DuraCoat. The key to success lies in adjusting the air pressure and the volume of DuraCoat by testing on a piece of newspaper until the spray pattern is just right. It’s best to apply DuraCoat in very thin layers, so adjust for a fine spray. Several thin coats are better than one thick coat.
After coating all the metal parts, let them sit undisturbed for at least 24 hours. After that, the parts can be handled, but it may take a week or longer for DuraCoat to reach its full hardness.
Article by BRYCE M. TOWSLEY


