


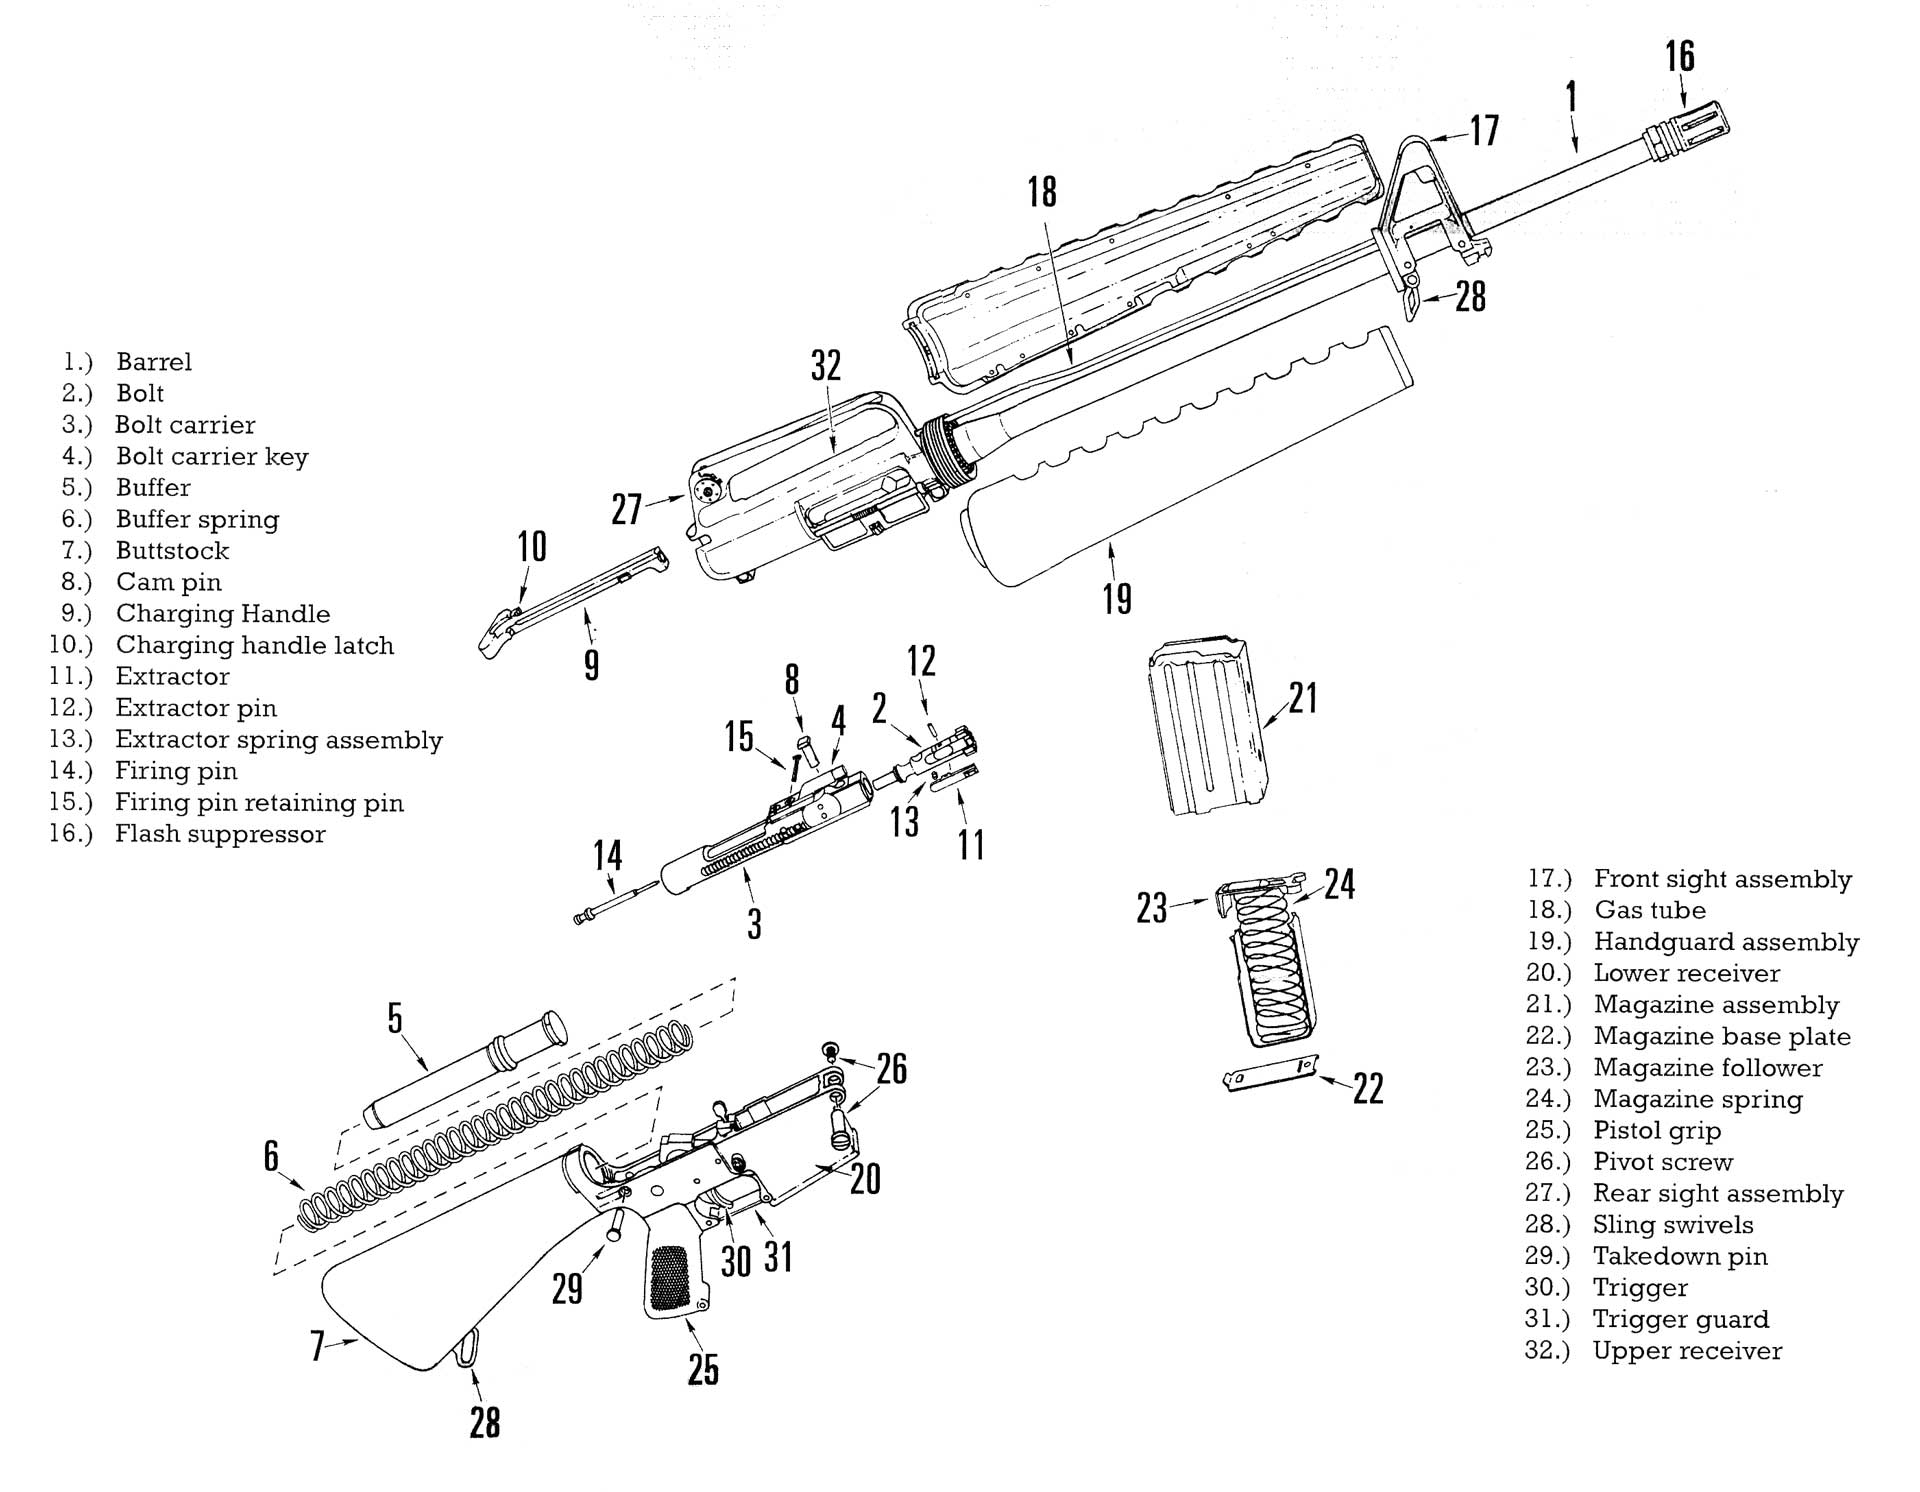
Back to Basics: AR-15 101
As with all other firearms, the AR-15 is inherently safe, but here are a few specifics to keep in mind when dealing with this platform. When you initially pick up the rifle, while following safe gun-handling protocol, you should also always ensure that the manual safety is engaged. With the muzzle pointed in a safe direction, rotate the selector lever-usually found on the left side of the lower receiver, just above the pistol grip-to the “safe” position. If it will not rotate to the “safe” position, this is an indication that the hammer is forward. To remedy this, grab the charging handle and, depressing the charging handle catch, pull it to the rear.
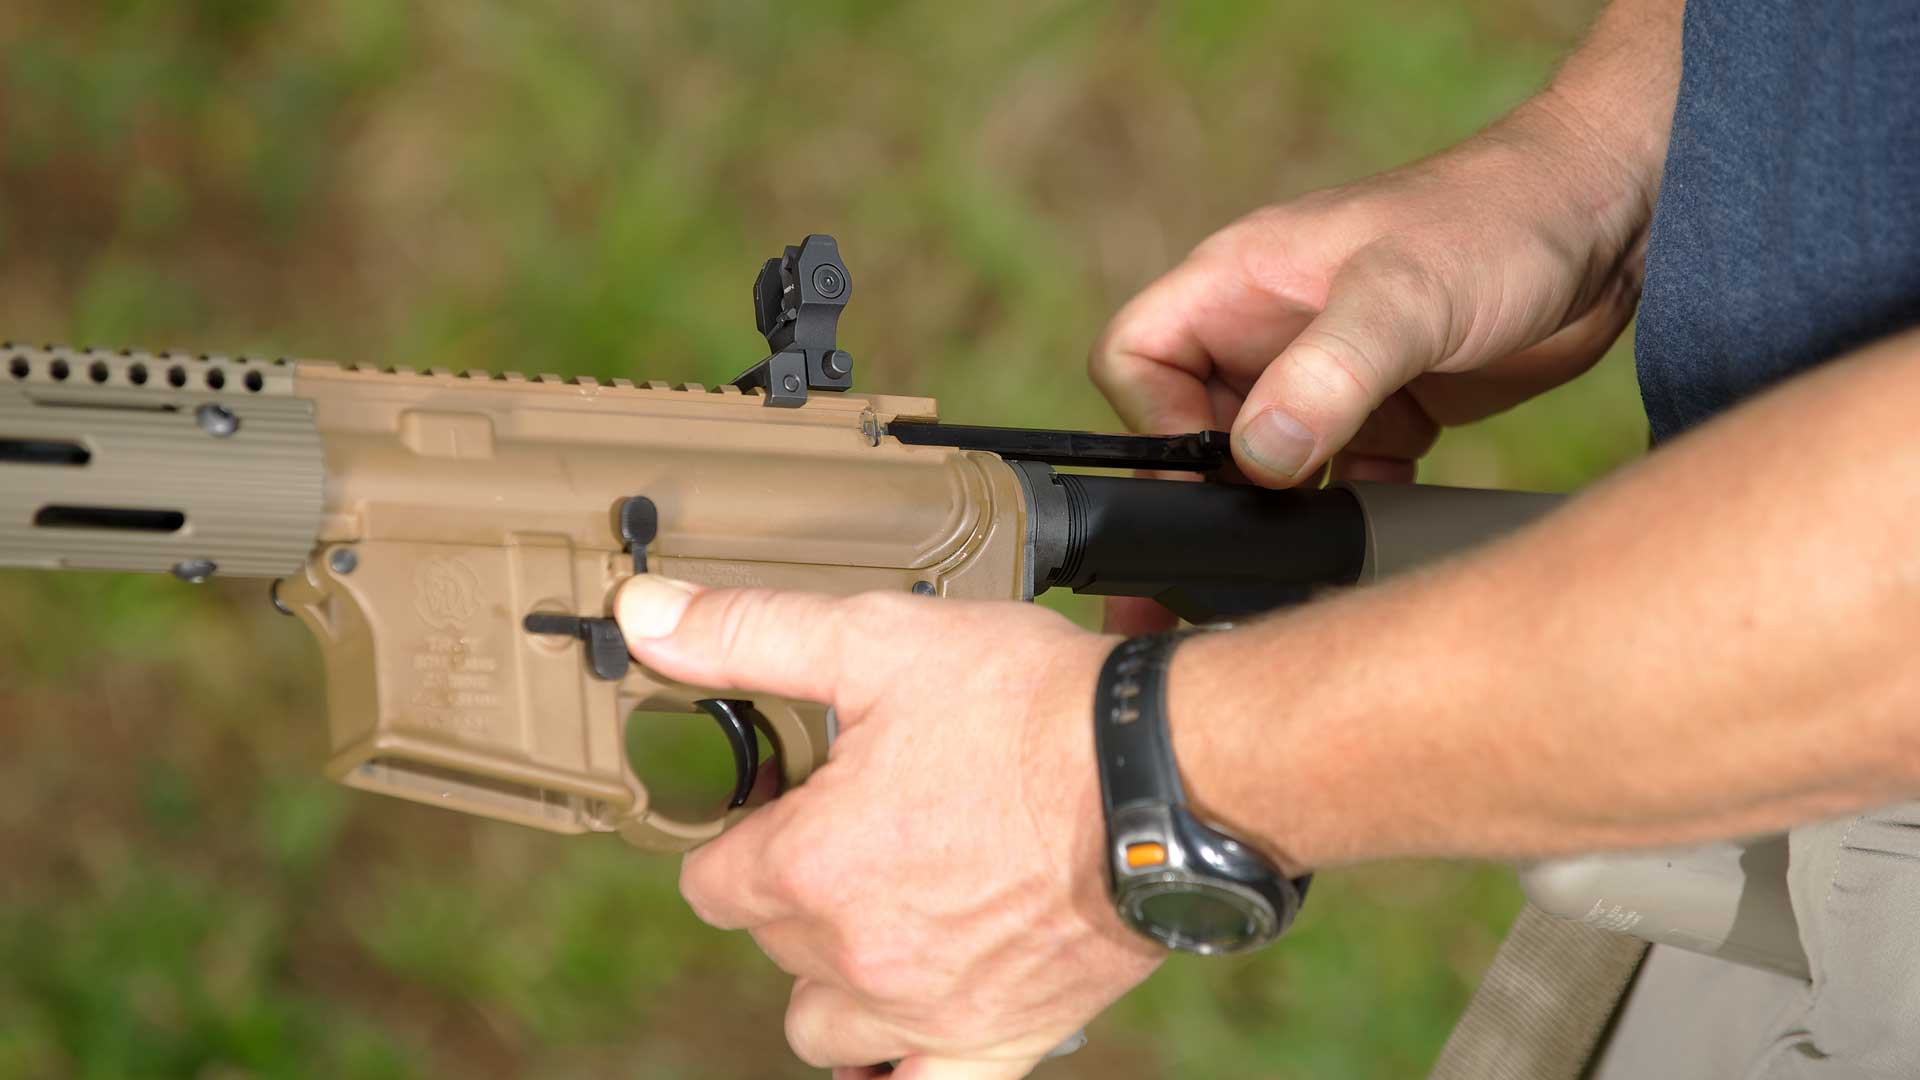
As you do so, the rifle’s bolt will be pulled rearward, cocking the hammer and opening the dust cover. Holding the bolt to the rear, or “open,” depress the bottom of the bolt catch-a small lever located above the front of the trigger guard, also on the left-and hold it down as you ride the bolt carrier forward. If you don’t hold the catch, the bolt will bypass it. Once the weight of the carrier has made contact with the catch, it will remain open. Now that the hammer is cocked, you will be able to rotate the selector to “safe.” Also, because the dustcover is open, this is a good time to double-check that there isn’t a round in the chamber.
- Buy All-American!
- Bring health and vitality back to your body with these non-transdermal patches
- Get your Vitamin B17 & Get 10% Off With Promo Code TIM
- How To Protect Yourself From 5G, EMF & RF Radiation - Use promo code TIM to save $$$
- The Very Best All-American Made Supplements On The Market
- Grab This Bucket Of Heirloom Seeds & Save with Promo Code TIM
- Here’s A Way You Can Stockpile Food For The Future
- Stockpile Your Ammo & Save $15 On Your First Order
- Preparing Also Means Detoxifying – Here’s One Simple Way To Detoxify
- The Very Best Chlorine Dioxide
- All-American, US Prime, High Choice Grass-Fed Beef with NO mRNA, hormones or antibiotics... ever!
Proper Loading Of The AR
You must know how to load your AR correctly. As a firearm instructor, the most prevalent malfunction I see with students is improper loading of the rifle. So, in order to eliminate that issue, here is a technique that works very well.
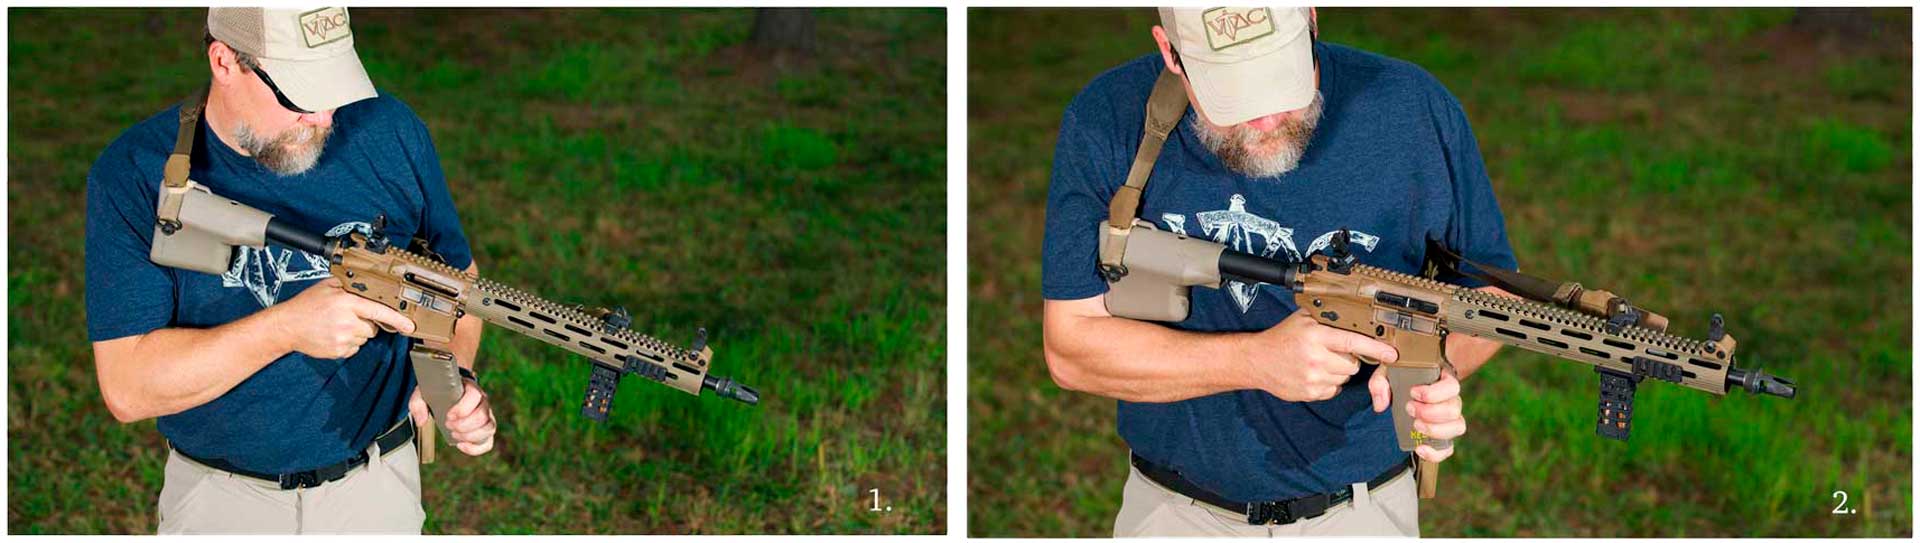
You can choose to lock the bolt to the rear, or not, but it is generally a bit easier to get the magazine to lock into the rifle if the bolt is locked to the rear (1.). Insert the magazine into the magazine well until it clicks, then pull down on the magazine to ensure it is locked in place. This is a key check that you must always conduct or you might get a surprise as you fire a round and the magazine falls free from the rifle (2.).
Once the magazine is securely in the rifle, release the bolt by hitting the paddle portion of the bolt catch. Let the bolt slam into battery, which will strip the top round from the magazine. Do not ride or ease the bolt forward; if you do there is a very good chance the bolt will not lock into battery, which will cause a malfunction.
After allowing the bolt slam into battery, confirm that there is a round in the chamber. Some shooters prefer to conduct a press check by pulling the bolt carrier slightly to the rear to visually or digitally (with their finger) confirm there is a round in the chamber. That does work, but the issue is getting the bolt back into the locked position. A more reliable check is to drop the magazine from the rifle and feel where the top round now lies (3.).
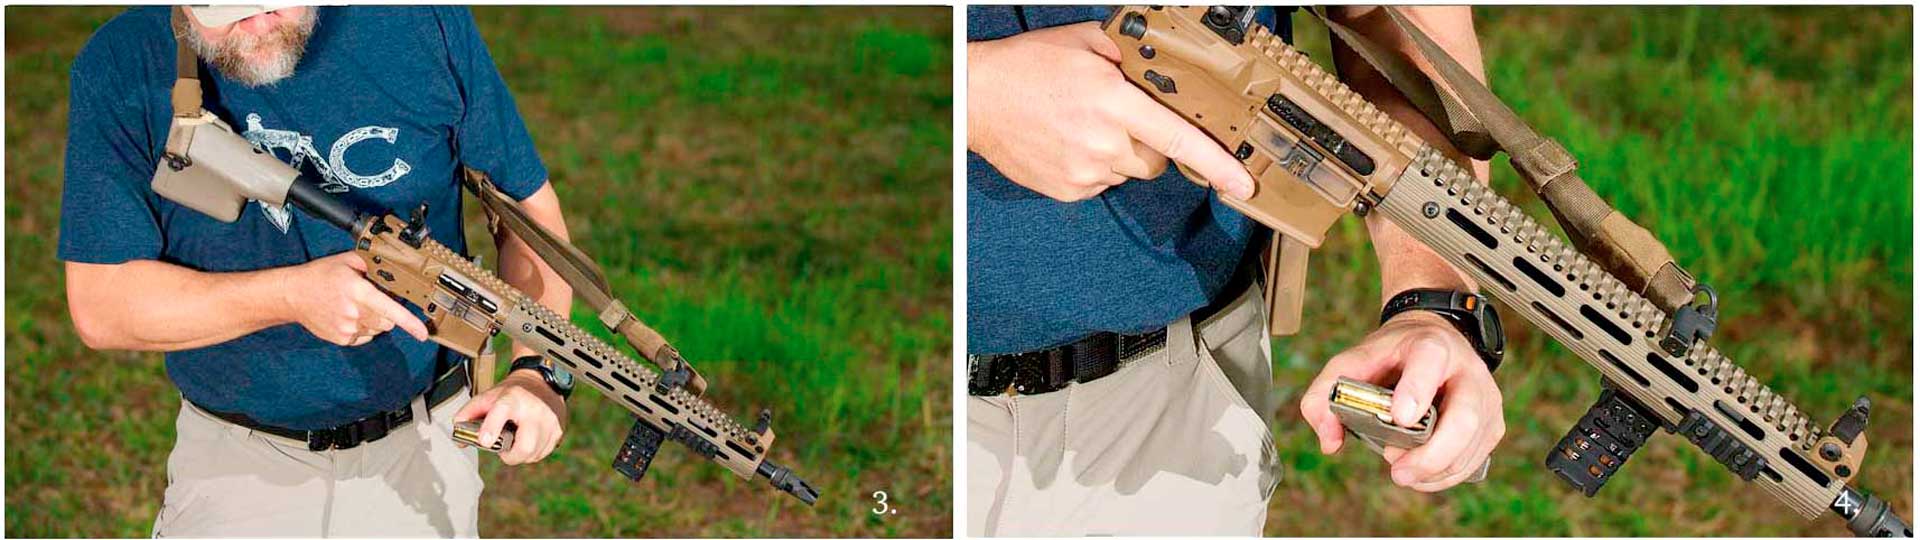
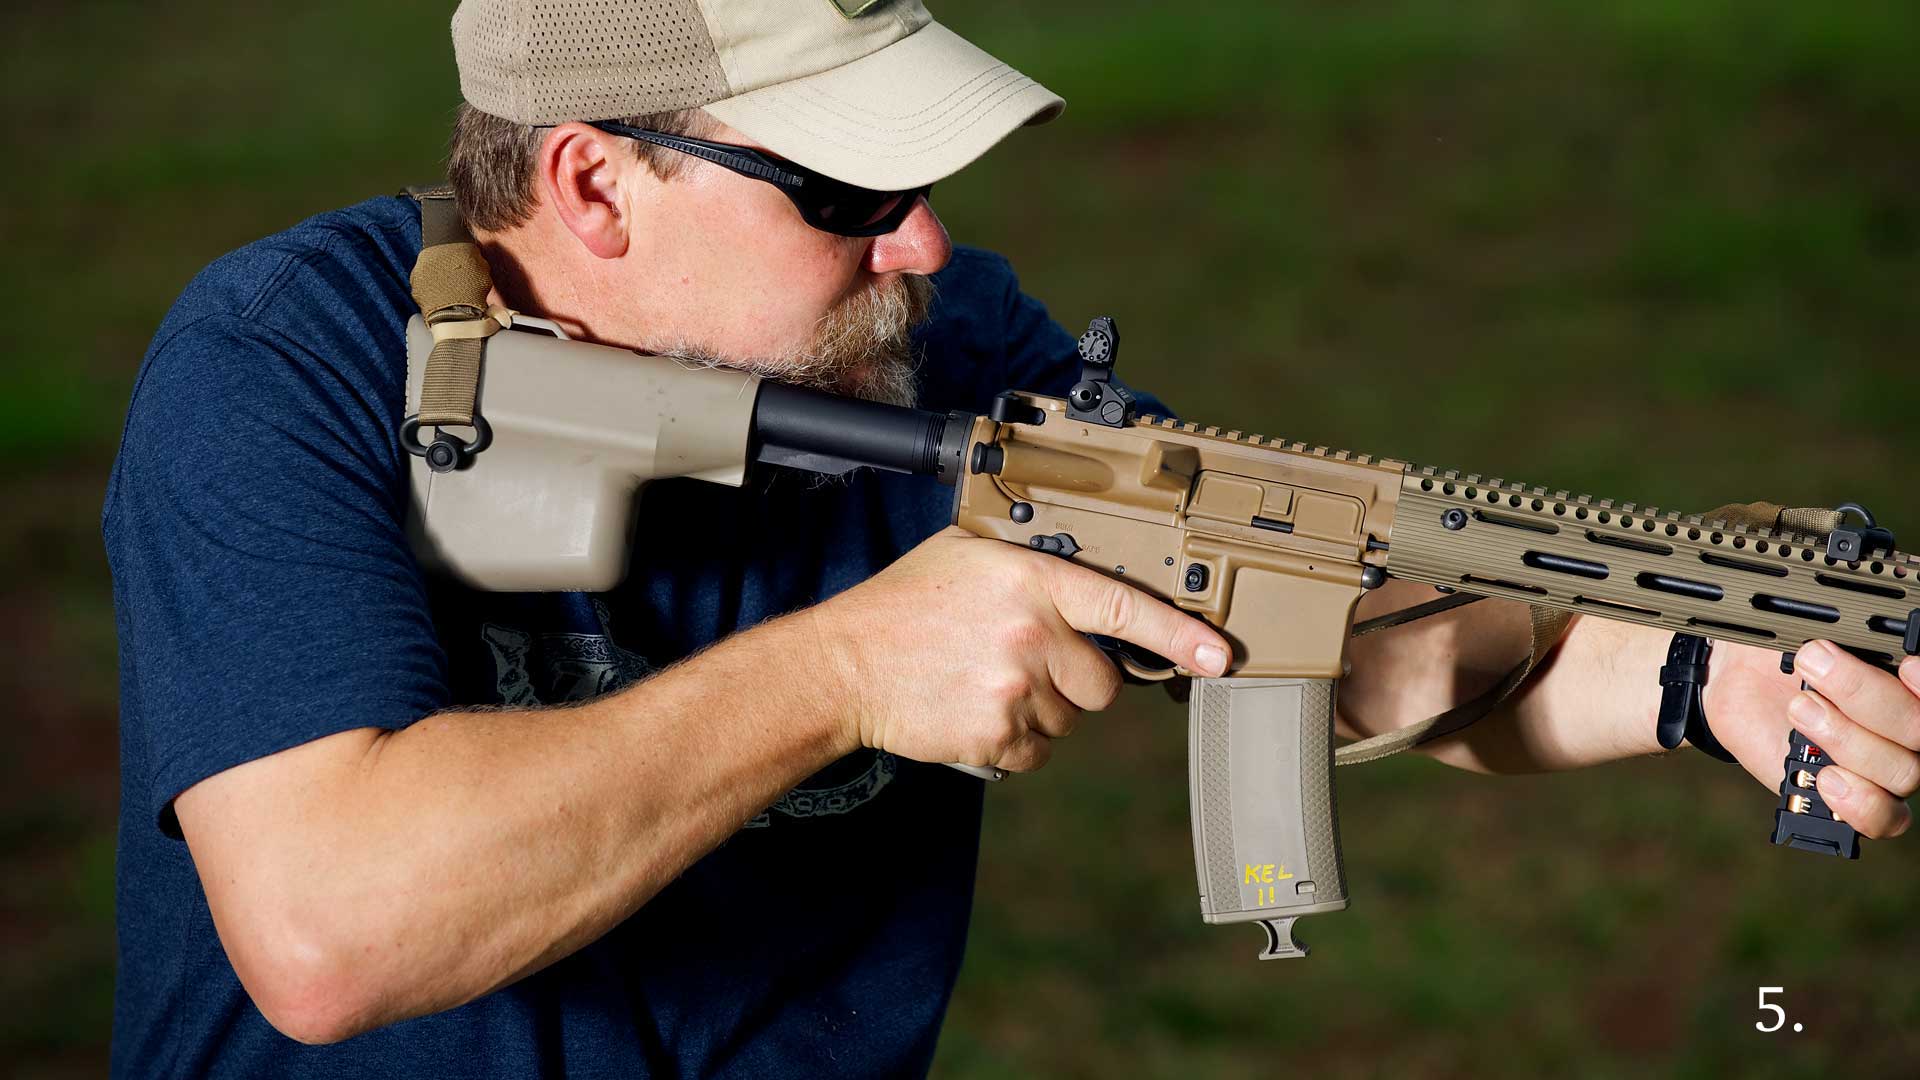
A full 30-round magazine, or one holding 28 rounds, will have the top cartridge sitting on the right side of the magazine follower. Once you have chambered the first cartridge, the top round in the magazine should be on the left-this can be seen and felt as you hold the magazine in your hand (4.). After confirming that the top cartridge is on the left, place the magazine back into the magazine well and pull down after you feel or hear the click. You are now successfully loaded (5.).
There is one small step remaining. Close your dust cover. This small cover does make a difference, as it will help to keep dust and dirt from entering the bolt carrier group, which will help with reliability.
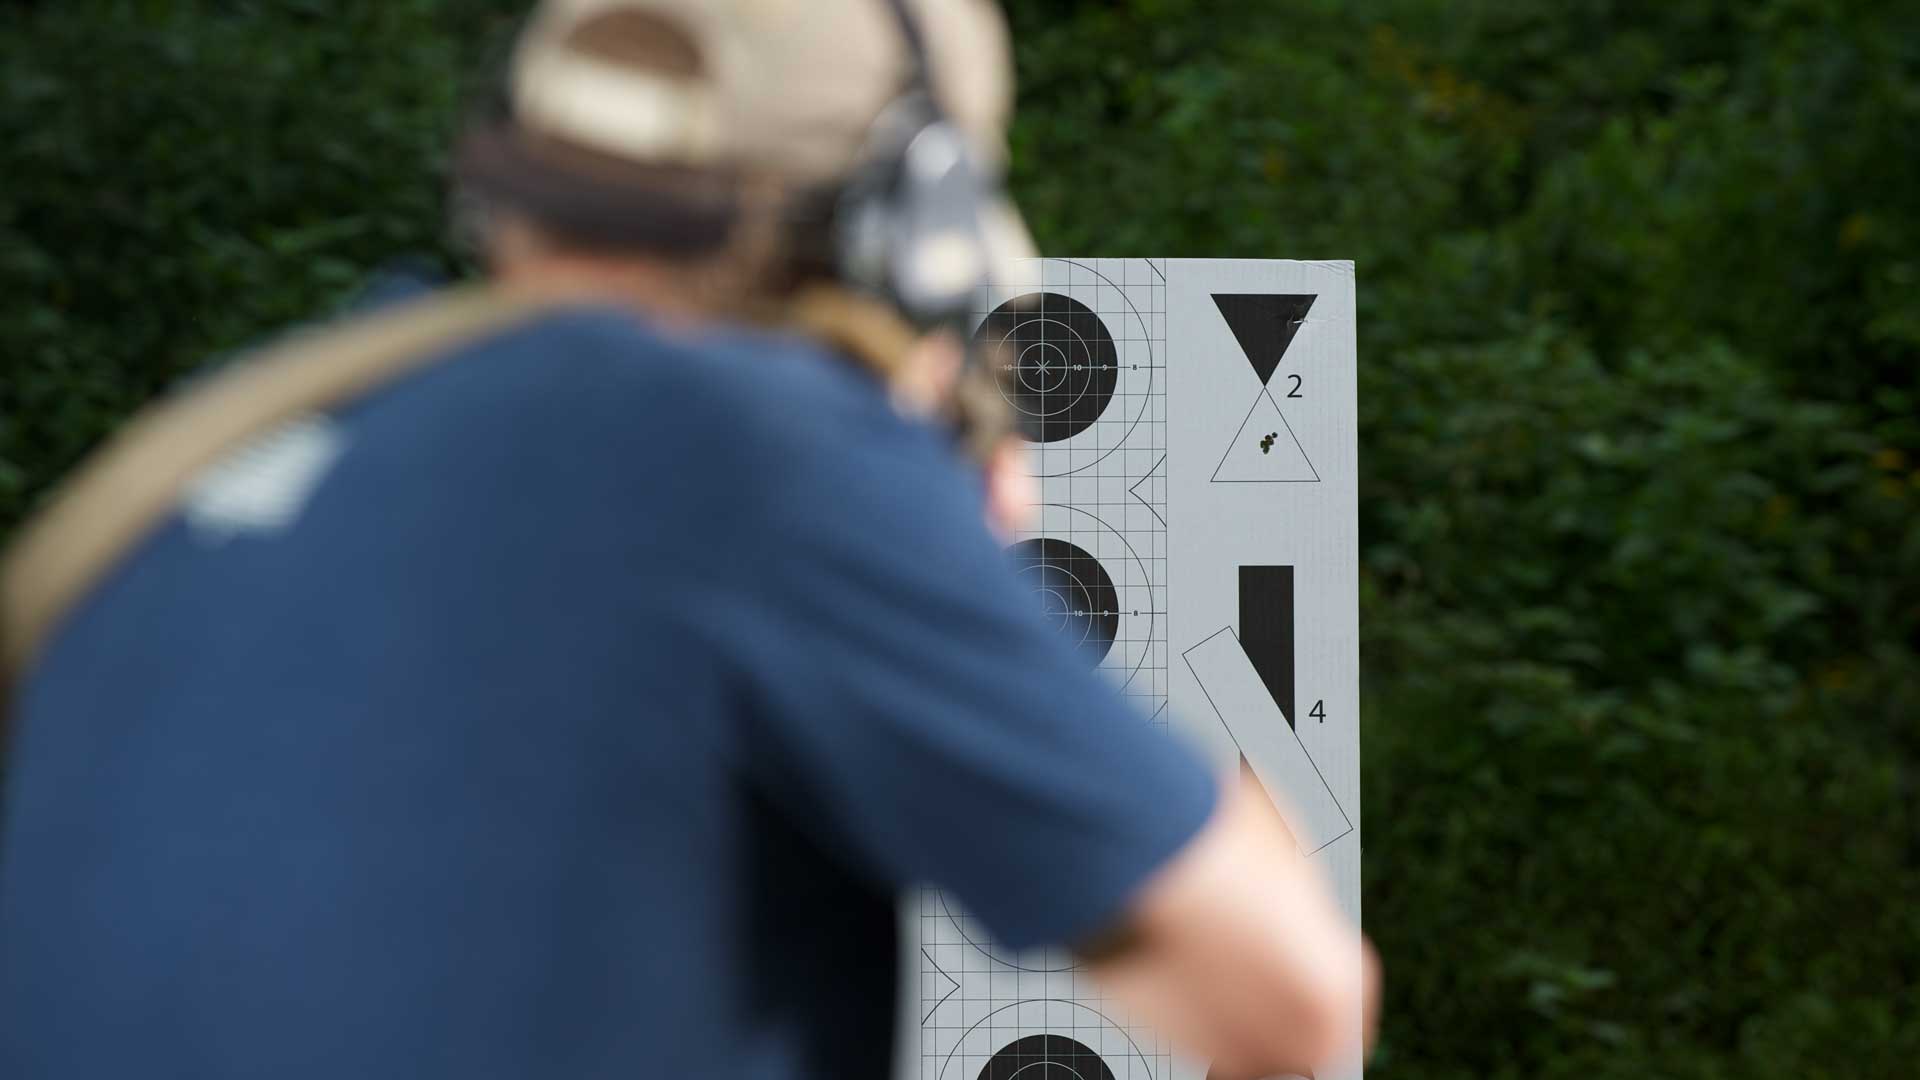
Time To Shoot
When you do head to the range it is important that your rifle is set up for success. With a multi-position stock you should check to see that it is set correctly for your stature. To check for proper length of pull, drop the buttstock into the crook of your shooting arm and grip the pistol grip. If your wrist is bent the buttstock is not long enough. This is a common error, as many shooters go for a short stock when, in fact, a slightly longer stock would enhance their control of the rifle. You will be able to control recoil much better and have more power if you are not contorted into a compressed shooting position. If your buttstock is too short, you will also have a hard time getting into a prone position.
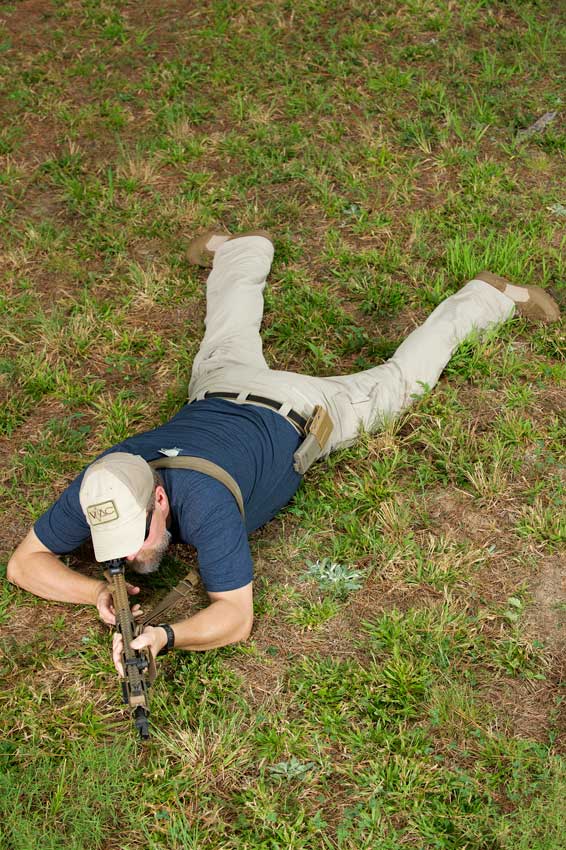
Prone Firing Position
“Going prone” means assuming a flat, belly-on-the-ground shooting position. It is not only one of the most basic firing positions, it is also one of the most stable. “Prone, unsupported,” simply refers to a prone position that does not utilize any sandbags or rests to support the firearm while shooting. Because such manufactured supports are rarely available in the field, developing a solid prone, unsupported firing position is an important step in becoming a sound, accurate shooter. To build a good prone unsupported position, you will get down on your belly and try to get comfortable behind the rifle.
There are a couple of tricks that I use that often help my students:
- Try to have your spine in a neutral position; this will allow you to quickly lift the rifle to move it left or right to engage other targets. If you are twisted into position, you will fatigue quickly and lose your ability to move.
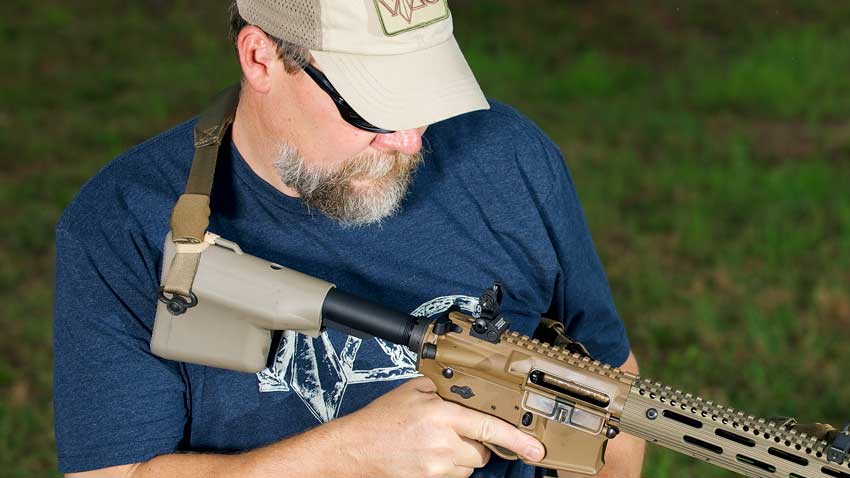
- Try to get your nose on the charging handle when in the prone position. If you are using optics, be sure they are mounted far enough forward to allow the nose on the charging handle. If you are using aperture sights, decide which aperture works best for this distance. Note: I use the small aperture to zero, then use the large aperture to shoot quickly.
- Place your 30-round magazine on the ground for support. Contrary to urban legend, the AR will not malfunction if you place your magazine on the ground to help increase stability.
If you must shoot from your elbows, try to get your supporting elbow more under the gun to help with recoil control and follow-through as you get back on target. - If you have a sling attached, use it. The adjustable sling will stabilize the prone position immensely. If you have a sling that works only as a carry strap, get a sling that can be used for carry and stability.
- Get your feet flat on the ground. Whether it be the tops of your feet or your insteps, it is important to maintain as much contact with the ground as possible. If you are on your toes while in the prone position, every movement will be exaggerated as you fire the rifle.
- Take a deep breathe, start your trigger prep, slowly release your breath, when you hit your natural respiratory pause the rifle should fire. If you don’t get the shot off, take another breath and continue with the trigger squeeze.
- Once the rifle fires, watch where your sights were as the round went down range, call your shot. Now slowly release until you hear and feel the disconnector click, repeat as necessary. (The disconnector is the hook-like part inside the fire-control mechanism that interfaces between the trigger and hammer.)

Lubed, loaded and on the range. Once you start using your AR, you will come to really appreciate the handling of this fine system. You will quickly see why this basic rifle–commercially available for more than a half-century–is so successful and why so many Americans are flocking to gun shops across the country to get their hands on one–or more–of them.
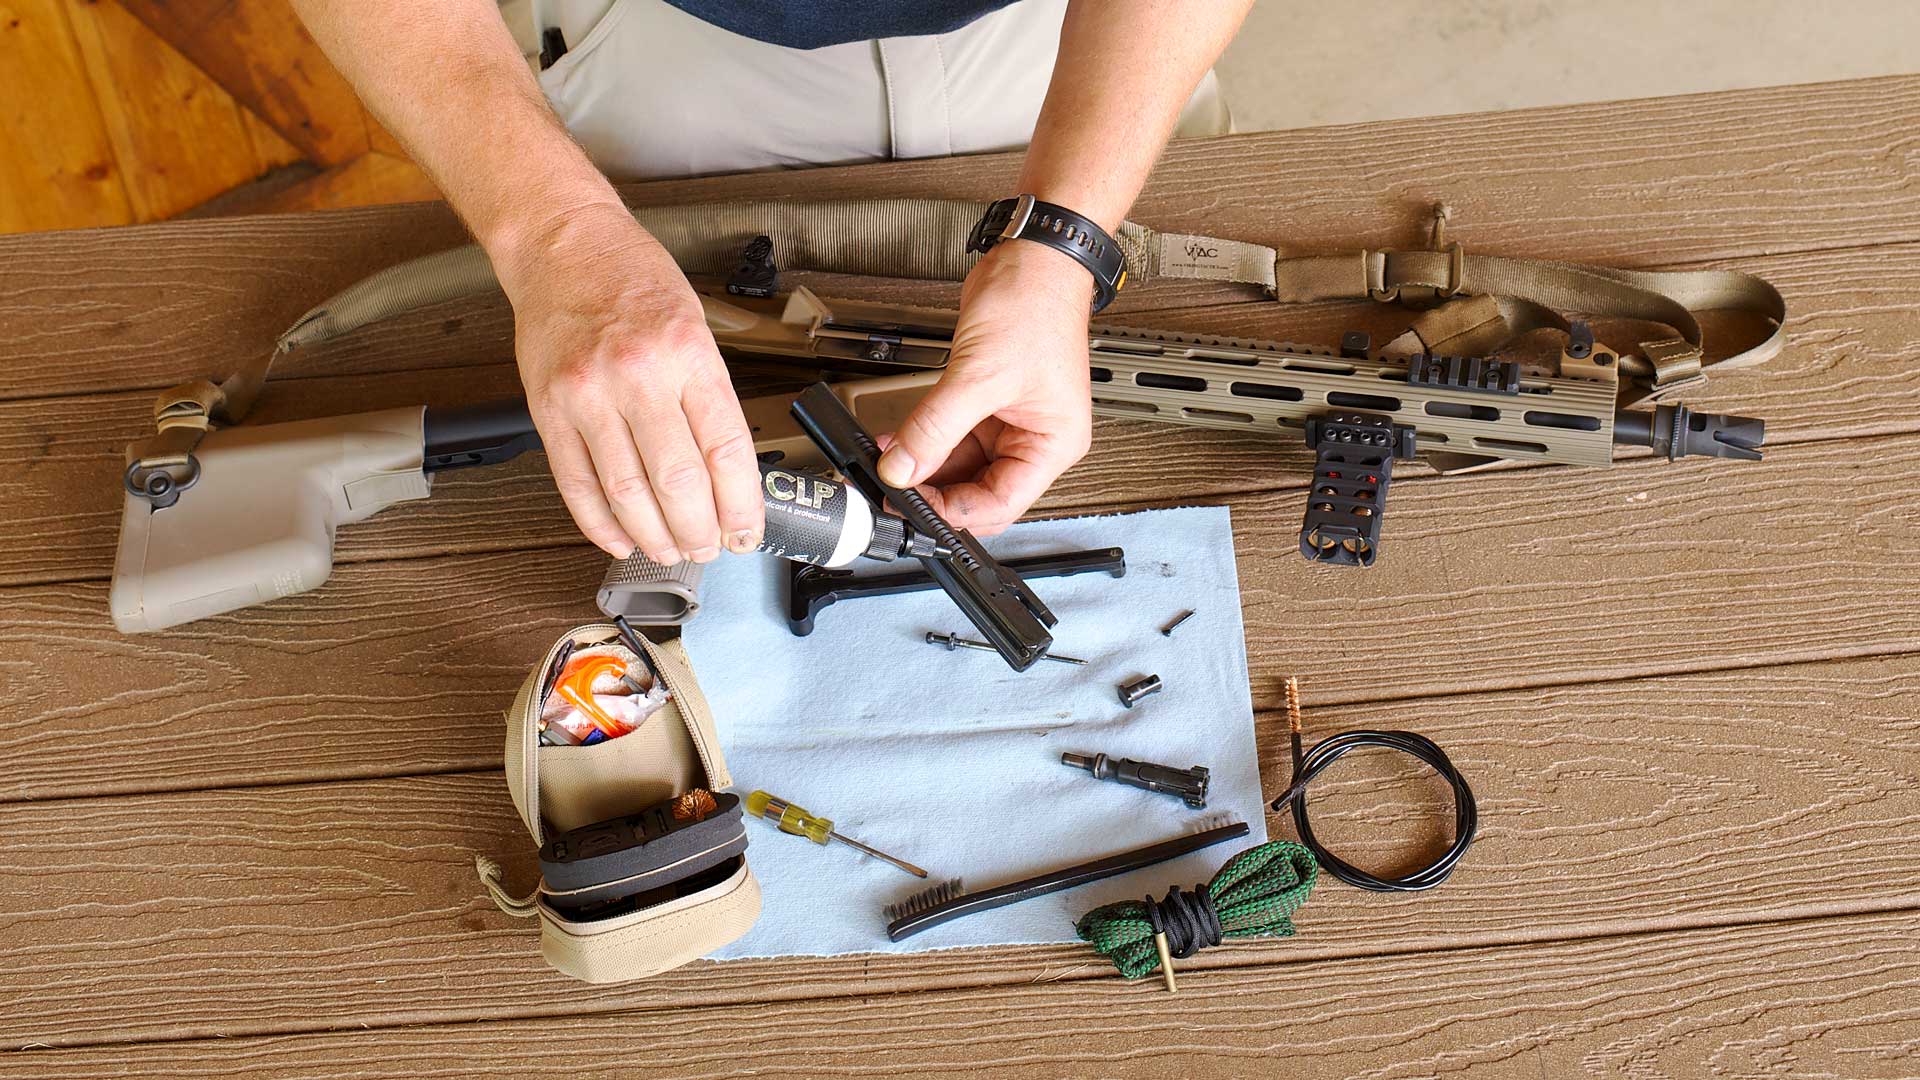
Maintenance & Field Stripping
To keep your rifle in optimal condition, cleaning and maintenance should be performed periodically. Unpacking a new gun for the first time, prior to or following extended storage, and before and after range sessions are all good times to break your carbine down and give it a once over. And while different events may call for different levels of maintenance, there are a few basic practices that can get you started.
Here is my procedure: After determining that the firearm is unloaded, ensure the bolt carrier is forward. If it is locked to the rear, release it by pushing the upper paddle of the bolt catch, or by pulling and releasing the charging handle. Next, push the take-down pin, located at the upper rear of the lower receiver, from left to right. Withdraw it until it stops-don’t attempt to take it all the way out. As you press it out, be careful not to allow the upper receiver, which can now rotate on the pivot pin at the front of the lower receiver to pinch your fingers as the carbine is broken open. You may hear a rifle in this stage of disassembly referred to as “shotgunned,” because when the gun is opened in the center with the upper and lower attached by the single pivot pin, the rifle resembles a break-open shotgun.
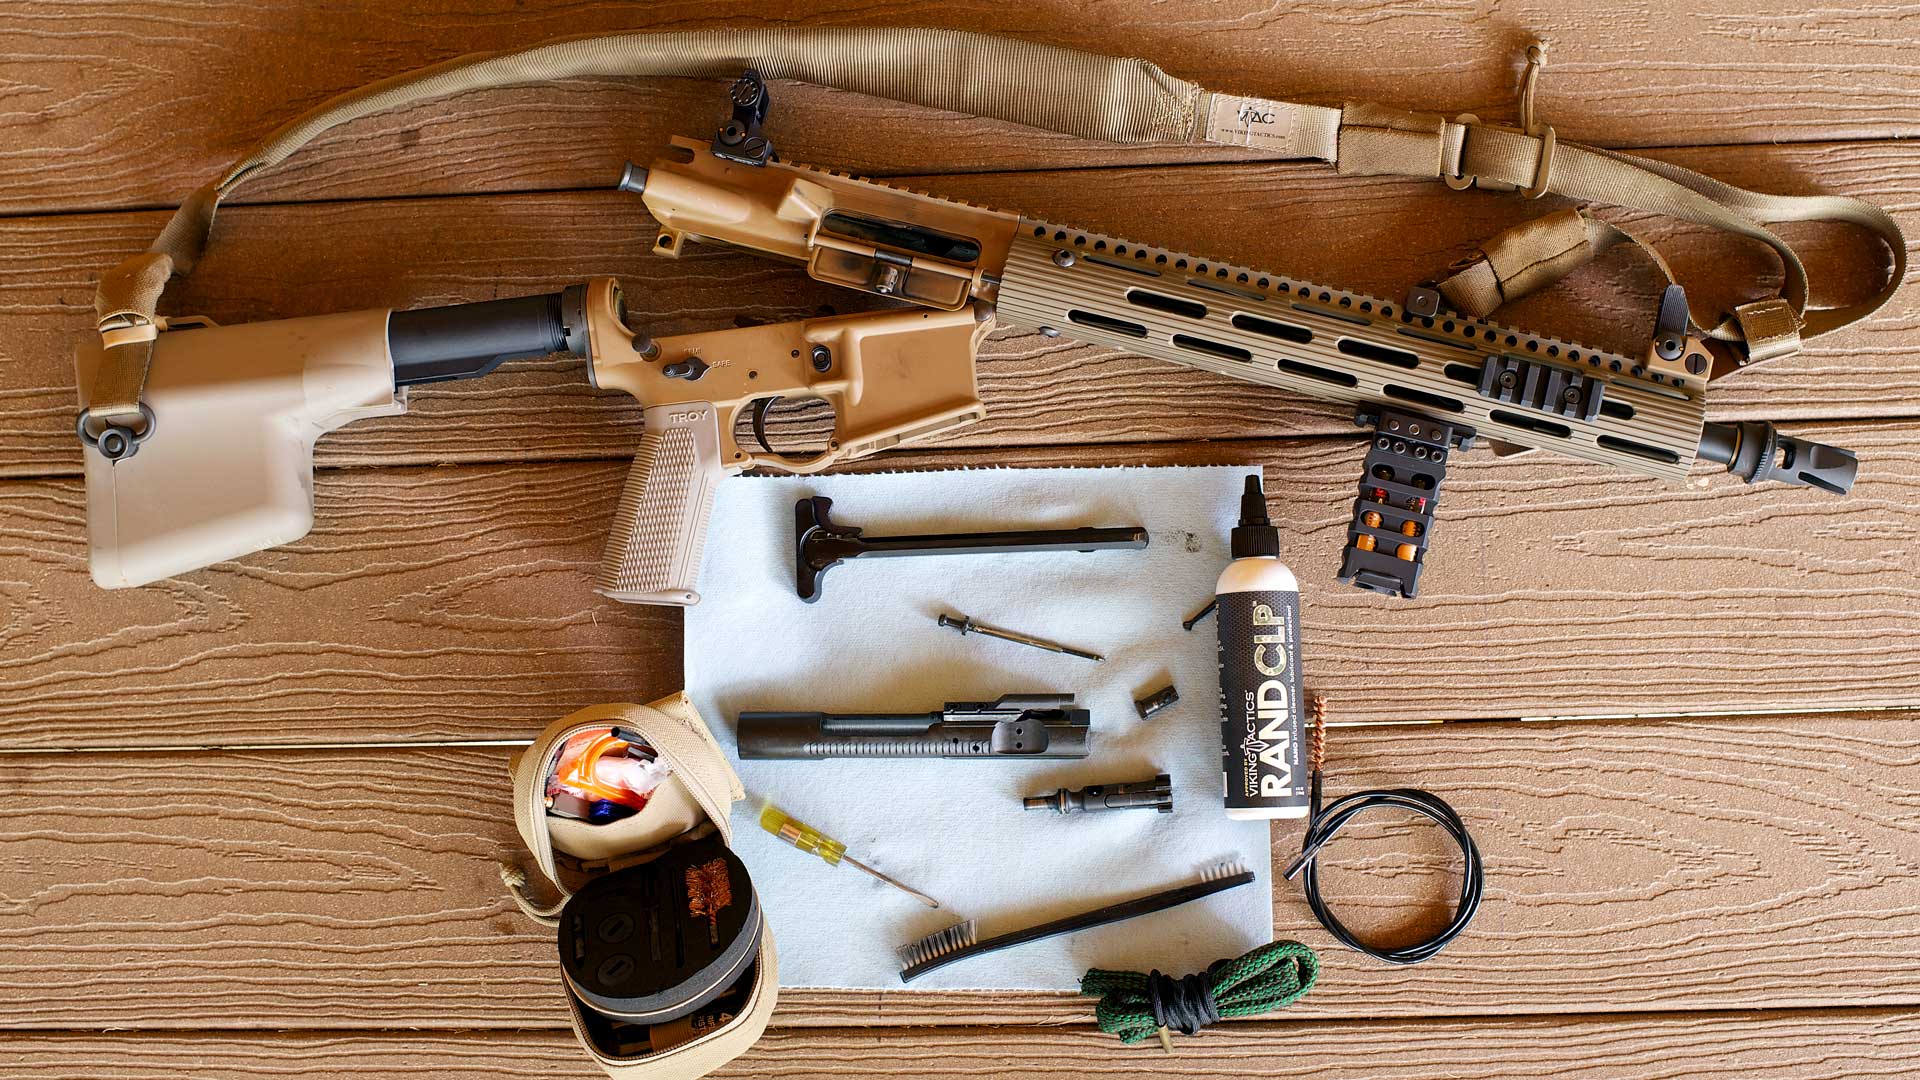
At this point, you will be able to grab the charging handle and pull it a few inches to the rear. As you do that the bolt carrier will, again, move with it. Once the back of the bolt carrier is exposed, simply pull it out of the upper receiver. To remove the charging handle, pull it until it stops, then push the entire part toward the bottom of the receiver. There is a small cutout that allows the charging handle to come free. The rifle is now considered field stripped and ready for wipe down and lubrication.
If you find the parts are very sticky or completely dry, you may need to disassemble the bolt and carrier as well. Don’t be alarmed, as this is an easy and necessary part of the cleaning process.
Bolt Carrier Disassembly
To disassemble the bolt carrier, use a small punch or screwdriver to hook the bent end of the cotter key, that holds the firing pin in place, and pull it out. Once the cotter key is removed, gently tap the rear end of the bolt carrier on a solid surface and the firing pin will fall free. To remove the bolt, twist the cam pin 90 degrees, the direction does not matter. Twisting it allows the head of the pin to easily clear the gas tube key when the bolt is pushed to the rear in the bolt carrier.
Once the cam pin is out, you can pull the bolt clear of the carrier for further inspection or cleaning. If you feel you need to remove the extractor from the bolt, it is a matter of pushing the cross pin out as you press in on the extractor to take off the pressure.
Once the parts are separated, wipe them down with a shop towel and a little Rand CLP (cleaner, lubricant, protectant) or other quality carbine lubricant. Don’t be afraid to add lube. Contrary to some opinions, the AR functions much better wet with oil than dry. If you plan to do any shooting or store the carbine, don’t be stingy with the lube.
Bolt Carrier Reassembly
After the parts are sufficiently lubed, putting the carrier back together is a cinch. If you removed the extractor, put it back into place on the side of the bolt with the small pin. Next let the bolt drop into the bolt carrier-do not force this part as the three small gas rings are not meant to be abused going into the carrier.
Once the bolt is in the carrier, rotate the bolt until the extractor is at the top right of the bolt carrier. That ensures you have it clocked correctly to receive the cam pin. The cam pin is pushed in so that it bypasses the gas key. Once fully pressed in, you can pull the bolt forward and twist the cam pin so that it is in the locked position. If it isn’t right, you will know when you try to insert the firing pin from the rear.
Drop the firing pin into the bolt carrier from the rear, making sure it is completely seated, then replace the cotter pin from left to right. After replacing the pin, gently tap the rear of the bolt carrier on your table to ensure that the firing pin is retained.
At this point, I apply a little lube along the raised portions of the bolt carrier, which are the bearing surfaces and need to have a good coat of CLP. It is also a good idea to run a bore brush or pull-through cleaning cable through the bore to remove any excess lube. While not intended to be a detailed cleaning, the cleaner the bore the better.
Place the charging handle back into the rifle by sliding it in from the rear as you push up, eventually you will hit the cutaway that allows the charging handle to pop into the rails. Push the charging handle forward just enough to ensure it is on the rail cuts, then, while most of the handle is still exposed, drop the bolt carrier in from the rear. The bolt must be in the forward position to slide into the upper receiver.
Close the upper and lower receivers and push the take-down pin back into place. Now you are ready for action.


