


Zeroing Handgun Lasers
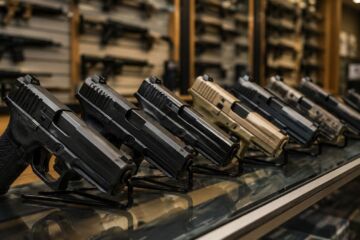
“Elementary.” Sherlock might say. At best, zeroing a laser is seen as a simple geometry problem and at worst, a tactical conundrum. The problem exists because the laser does not shine down the barrel of your handgun, nor can it conform to the bullet’s path. In most cases, it will either be mounted well below the centerline of the bore, as in the case of a rail-mounted laser, or it will be below and to the right of the barrel, as withCrimson Trace Lasergrips. The exceptions are the fixed beam guide-rod lasers fromLaserMax. Permanently zeroed at the factory, they are situated just below the bore and in close alignment with it. However, the company’s frame- and rail-mounted lasers present some of the same issues we’re addressing here.
The offset complicates things. Not only are you dealing with a triangular calculation, you must also account for the trajectory of the bullet. And, to further confuse the computations, your handgun’s sight must be considered.
There are essentially three ways to zero a laser. Let’s call them Parallel, Spot-On and Sight-High. Each method has its pros and cons. What needs to be kept in mind from the outset is that none of us can shoot a defensive handgun with extreme precision—we are targeting a zone as opposed to a spot.
- Buy All-American!
- Bring health and vitality back to your body with these non-transdermal patches
- Get your Vitamin B17 & Get 10% Off With Promo Code TIM
- How To Protect Yourself From 5G, EMF & RF Radiation - Use promo code TIM to save $$$
- The Very Best All-American Made Supplements On The Market
- Grab This Bucket Of Heirloom Seeds & Save with Promo Code TIM
- Here’s A Way You Can Stockpile Food For The Future
- Stockpile Your Ammo & Save $15 On Your First Order
- Preparing Also Means Detoxifying – Here’s One Simple Way To Detoxify
- The Very Best Chlorine Dioxide
- All-American, US Prime, High Choice Grass-Fed Beef with NO mRNA, hormones or antibiotics... ever!
Parallel Zero
The Parallel method has the laser beam adjusted so it parallels the centerline of the bore. In other words, the offset between the centerline of the barrel and the laser—at the handgun—remains constant, regardless of the distance to the target. The parallel method is most often employed with carbines, where the offset is very large and trajectory out to 100 yards or so is quite flat.
With the Parallel method, the need to compensate for an ever-changing horizontal offset is eliminated. But, it does nothing to compensate for trajectory. Using this zero on a handgun, a rail-mounted laser will shine on the target within about 3 inches of your point-of-impact (POI) all the way out to around 50 yards, depending on your load, of course. With Lasergrips, the vertical discrepancy will be much smaller, but just as constant.
The parallel zero takes away your ability to see the laser on the target if you present the handgun so the sights are properly aligned, because the handgun’s profile will obscure the laser.

Spot-On Method
When using the Spot-On zero, you sight the laser so it intersects the bullet’s path at a certain distance. The Spot-On method may seem to be the obvious choice since it is the procedure used for zeroing most firearms with sights or optics. However, due to offset, you can potentially encounter problems.
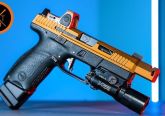
For example, I mounted one of Crimson Trace’s new and compact Rail Master lasers to a SIG P226 Elite. The laser beam was positioned 1.66 inches below the center of the barrel. Given a 10-yard zero and the flat trajectory of a 125-grain .357 SIG load, the laser was nearly 3 inches above the POI at 25 yards and more than 8 inches high at 50 yards. With the more arching trajectory of a 230-grain .45 ACP load, the bullet would strike more than 3 inches below the laser at 25 yards. (See Diagram 1).
With the large offset associated with rail-mounted lasers, zeroing at a greater distance would seem to be the answer. Using the same .45 ACP load with a 25-yard zero, the bullet will strike within 3 inches of the laser out to just beyond 40 yards. (See Diagram 2). But, the problem remains. When you present your handgun to the target and gander across the sights, your laser will be invisible unless your target is almost 50 yards away. If you consider a laser as only a secondary sight, this will probably not matter. However, if you deem it your primary sight, you’ll want the laser immediately visible any and every time you draw down on something. This is where the Sight-High zero comes into play.

The Sight-High Zero Option
The Sight-High method requires the laser be adjusted so it appears above your front sight at any distance beyond a few yards. The advantage of the Sight-High zero method is rooted in the notion that when you present a handgun to the target, you do so with the intention of aligning the sights. If you have a consistent and practiced presentation, when your handgun finds the target you should see your laser shining right above the front sight.
The problem with this approach is that with a rail-mounted laser the large offset drastically magnifies the difference between the point-of-aim (POA) and POI, as target distance increases. With Lasergrips, the vertical discrepancy is not as large, but a horizontal offset must now be dealt with. This is because Lasergrips have the laser positioned to the right of the barrel’s centerline.
With the Sight-High method, you must decide how high to zero the laser above the front sight and at what distance to do so. When I assisted Gunsite Academy instructors Dave Starin and Chris Weare to put together the Gunsite/Crimson Trace Laser Integrated 250 Pistol Course, we agreed the Sight-High option provided the most sound tactical advantage. This was primarily because Gunsite Academy trains shooters—as it should—to draw to their sights. If your laser is adjusted Sight-High and you draw to your sights, it should always be visible. According to Starin, “I have not found any way better than adjusting the laser to sit just above the front sight at 10 yards. It’s the fastest, easiest way I’ve found, and works with all models.”

I, however, prefer the laser to shine about an inch to 1.5 inches above the front sight at 10 yards. That way, even if my draw stroke and initial alignment of the pistol is a bit off, I can still pick up the laser. Like with most things firearms related, there’s room to argue, and the best option might be somewhere in the middle.

For example, if you outfit a 1911 Commander in .45 ACP with Crimson Trace Lasergrips, your offset between the barrel and the laser—at the muzzle—will be about .5 inches vertically and horizontally. By applying the Sight-High zero method, with the laser about 1.5 inches above the sight at 10 yards, your bullet will strike the target somewhere within 3 inches of where the laser is pointing out to about 20 yards. (See Diagram 3).
If you use the Gunsite-suggested, 10-yard Sight-High method, your bullet will be within 3 inches of the laser out to about 30 yards. (See Diagram 4). But inside 10 yards, you may have to look to find your laser on the target. It will be hiding behind the profile of your handgun, if you are looking over your sights. In reality, with repetitive laser training, you’ll begin to pick up the laser on the target before you have completed your draw stroke, so this may or may not matter.

When using either Sight-High method at common defensive handgun ranges—less than 25 yards—your POA/POI disagreement will be within your marksmanship ability. However, as the range to the target increases, so does the POA/POI divergence. To be precise at long range, not only will you have to compensate for trajectory, you’ll need to make a slight windage adjustment. Then, of course, the argument is what business you have in a defensive handgun fight beyond 75 feet. Other, more tactically sound options probably exist.
Tactically Speaking
This all might seem to be a terrible and needless over complication. Depending on how much you practice and how you view the laser sight, that could be true. So, let’s take a pragmatic approach and try to sort it out.
The facts are:
1. You cannot adjust your laser so it will always match your point-of-impact.
2. A laser sight is no good if you cannot see it.
3. Lasers can break, batteries die and you may fail to activate the switch.
4. You will have a target (threat) focus until you make the decision to look at your front sight.


Given the laws of the universe, some measure of the Sight-High zero is likely the best answer. Even if you plan on the laser as your primary sight, you must proceed under the premise you may not be able to use, see or activate it. This makes the default response drawing to your sights, with the intent to use them. Starin offers that, “You should use the front sight to find the laser and not walk the laser to target.” With experience, he also speculates that, “You’ll likely not have the time or ability to make windage and elevation hold adjustments during the defensive use of your laser-equipped handgun.”
In short, if while presenting the handgun to the target, you see the laser on the target, go with it. You’ll probably shoot more accurately and faster than if you shift your focus to the front sight. And finally, given that most defensive handgun encounters occur inside 25 yards, your POA/POI error—with the Sight-High zero method—should be within an acceptable margin.
There is another prudent reason for remaining fixed on the sights. Gunsite instructor Chris Weare has learned a few things while teaching laser courses. “Many shooters have problems keeping their laser activated during sustained firing.” Their grip changes, and buttons and switches can become pressed during handgun manipulation. If that happens and you’re not looking across your sights when your laser dot disappears, you’ll have to find them. Precious seconds lost in a life-or-death encounter are
lost forever.

Both Eyes Open
Regardless of which laser-zeroing method you decide to use, frequent practice will be vitally important. The savvy among us will learn to keep both eyes open while shooting their defensive handgun. This will make locating the laser on the target much easier, no matter what zeroing method is employed. It also greatly enhances your peripheral vision and situational awareness. That’s the real “elementary” take away from all this. I think Mr. Holmes would agree.
Note: The referenced calculations were derived with the assistance of the Sierra Infinity Ballistics Program and are theoretical in nature. Not only will actual results vary, your ability—or lack thereof—to shoot well enough at any distance will greatly impact your capacity for establishing precise laser zero.


